
Introduction:
In the dynamic landscape of software development, architects and developers constantly seek robust design patterns that ensure scalability, maintainability, and efficient resource utilization. One such time-tested approach is the 3-tier architecture, a well-structured model that divides an application into three interconnected layers. This architectural style has been a cornerstone for building scalable and resilient applications for decades.
Understanding the Basics:
The 3-tier architecture is composed of three primary layers, each with distinct responsibilities:
- Presentation Layer:
Also known as the user interface layer, this tier is responsible for interacting with end-users.
It encompasses the user interface components, such as web pages, mobile apps, or any other interface through which users interact with the application.
The goal is to provide a seamless and intuitive user experience while keeping the presentation logic separate from the business logic.
2. Application (or Business Logic) Layer:
Positioned between the presentation and data layers, the application layer contains the business logic that processes and manages user requests.
It acts as the brain of the application, handling tasks such as data validation, business rules implementation, and decision-making.
Separating the business logic from the presentation layer promotes code reusability, maintainability, and adaptability to changes.
3. Data Layer:
The data layer is responsible for managing and storing the application’s data.
It includes databases, data warehouses, or any other data storage solutions.
This layer ensures data integrity, security, and efficient data retrieval for the application.
By isolating data-related operations, developers can optimize data access and storage mechanisms independently of the rest of the application.
Benefits of 3-Tier Architecture:
- Scalability:
The modular nature of 3-tier architecture allows for independent scaling of each layer.
This enables efficient resource allocation, ensuring that specific components can be scaled based on demand without affecting the entire application.
2. Maintainability:
With clear separation of concerns, developers can make changes to one layer without impacting others.
This facilitates easier debugging, updates, and maintenance, as modifications can be confined to the relevant layer.
3. Flexibility and Adaptability:
The architecture accommodates technology changes and updates without disrupting the entire system.
New technologies can be integrated into specific layers, allowing the application to evolve over time.
Prerequisites:
kubectl — A command line tool for working with Kubernetes clusters. For more information, see Installing or updating kubectl. https://docs.aws.amazon.com/eks/latest/userguide/install-kubectl.html
eksctl — A command line tool for working with EKS clusters that automates many individual tasks. For more information, see Installing or updating. https://docs.aws.amazon.com/eks/latest/userguide/eksctl.html
AWS CLI — A command line tool for working with AWS services, including Amazon EKS. For more information, see Installing, updating, and uninstalling the AWS CLI https://docs.aws.amazon.com/cli/latest/userguide/cli-chap-install.html in the AWS Command Line Interface User Guide.
After installing the AWS CLI, I recommend that you also configure it. For more information, see Quick configuration with aws configure in the AWS Command Line Interface User Guide. https://docs.aws.amazon.com/cli/latest/userguide/cli-configure-quickstart.html#cli-configure-quickstart-config
Steps:
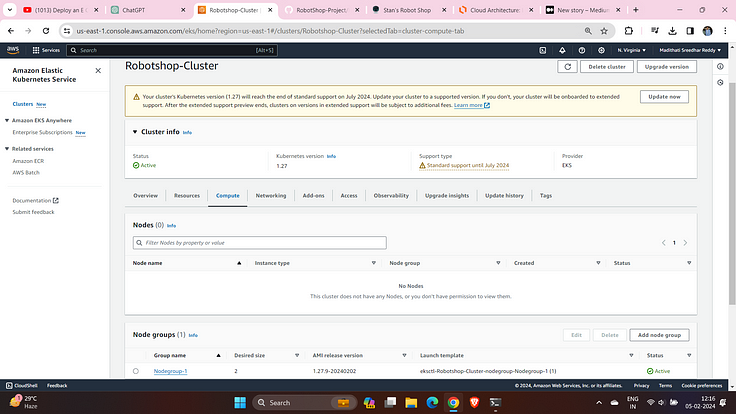
Step-1: Create an EKS Cluster
eksctl create cluster \
  --name your-cluster-name \
  --region your-region \
  --nodegroup-name your-nodegroup-name \
  --node-type t3.small \
  --nodes 2 \
  --nodes-min 1 \
  --nodes-max 3
This will create an EKS Cluster along with the node-group
Step-2: Configure IAM OIDC provider
- Export Cluster Name and assign oidc_id
export cluster_name=<CLUSTER-NAME>
oidc_id=$(aws eks describe-cluster --name $cluster_name --query "cluster.identity.oidc.issuer" --output text | cut -d '/' -f 5)
2. Check if there is an IAM OIDC provider configured already
aws iam list-open-id-connect-providers | grep $oidc_id | cut -d "/" -f4
3. If not, run the below command.
eksctl utils associate-iam-oidc-provider --cluster $cluster_name --approve
Step-3: Setup ALB Add-On
- Download IAM policy.
curl -O https://raw.githubusercontent.com/kubernetes-sigs/aws-load-balancer-controller/v2.5.4/docs/install/iam_policy.json
2. Create IAM Policy.
aws iam create-policy \
    --policy-name AWSLoadBalancerControllerIAMPolicy \
    --policy-document file://iam_policy.json

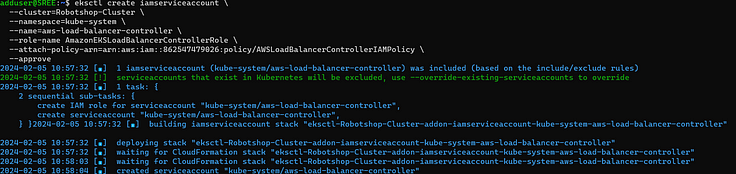
3. Create IAM Role.
eksctl create iamserviceaccount \
  --cluster=<your-cluster-name> \
  --namespace=kube-system \
  --name=aws-load-balancer-controller \
  --role-name AmazonEKSLoadBalancerControllerRole \
  --attach-policy-arn=arn:aws:iam::<your-aws-account-id>:policy/AWSLoadBalancerControllerIAMPolicy \
  --approve
Step-4: Deploy ALB controller
- Add helm repo.
helm repo add eks https://aws.github.io/eks-charts
2. Update the repo.
helm repo update eks

3. Install the chart.
helm install aws-load-balancer-controller eks/aws-load-balancer-controller -n kube-system --set clusterName=<your-cluster-name> \--set serviceAccount.create=false --set serviceAccount.name=aws-load-balancer-controller --set region=<region> --set vpcId=<your-vpc-id>
4. Verify that the deployments are running.
kubectl get deployment -n kube-system aws-load-balancer-controller

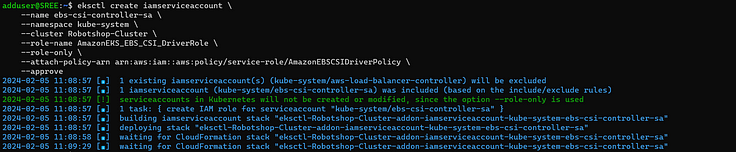
Step-5: EBS CSI Plugin configuration.
The Amazon EBS CSI plugin requires IAM permissions to make calls to AWS APIs on your behalf.
Create an IAM role and attach a policy. AWS maintains an AWS managed policy or you can create your own custom policy. You can create an IAM role and attach the AWS managed policy with the following command. Replace my-cluster with the name of your cluster. The command deploys an AWS CloudFormation stack that creates an IAM role and attaches the IAM policy to it.
eksctl create iamserviceaccount \
    --name ebs-csi-controller-sa \
    --namespace kube-system \
    --cluster <YOUR-CLUSTER-NAME> \
    --role-name AmazonEKS_EBS_CSI_DriverRole \
    --role-only \
    --attach-policy-arn arn:aws:iam::aws:policy/service-role/AmazonEBSCSIDriverPolicy \
    --approve
3. Run the following command. Replace with the name of your cluster, with your account ID.
eksctl create addon --name aws-ebs-csi-driver --cluster <YOUR-CLUSTER-NAME> --service-account-role-arn arn:aws:iam::<AWS-ACCOUNT-ID>:role/AmazonEKS_EBS_CSI_DriverRole --force

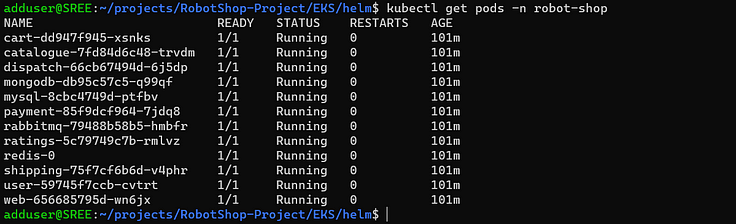
Step-6: Install the Helm Chart:
- Initially Clone the GitHub Repo:
- GitHub URL : RobotShop-Project
git clone https://github.com/uniquesreedhar/RobotShop-Project.git
2. Then Navigate to the path where chart.yaml exists
cd RobotShop-Project/EKS/helm
3. Create a namespace and then install the helm chart.
kubectl create ns robot-shop
helm install robot-shop --namespace robot-shop .

4. Ensure all the pods are running if not troubleshoot the issues.
Step 7: Create Ingress
cd /RobotShop-Project/EKS/helm
 kubectl apply -f ingress.yaml
This will create a Load Balancer on the AWS console.
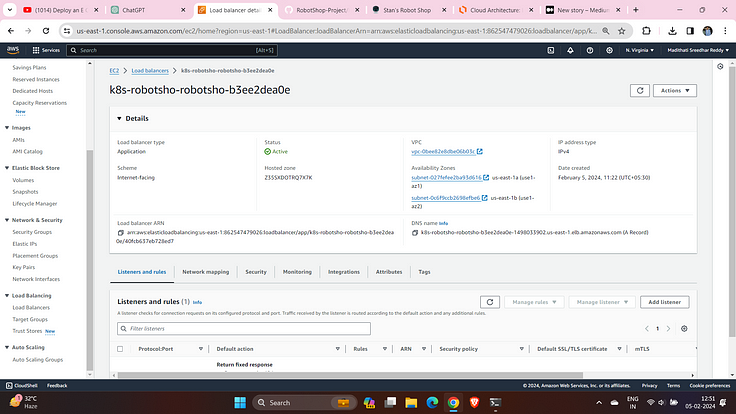
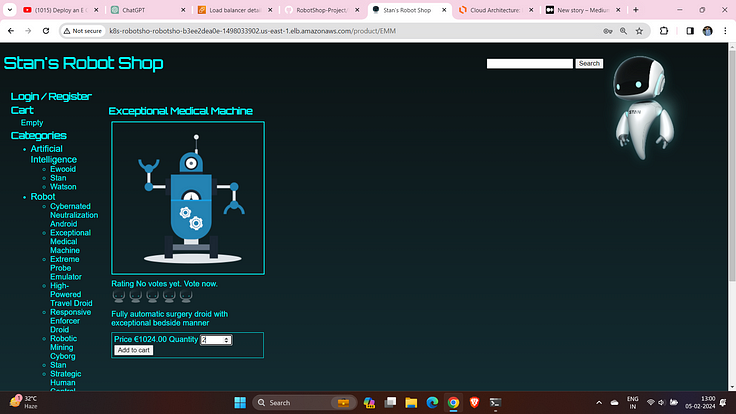
Paste the DNS-name on your favourite browser and access the application.
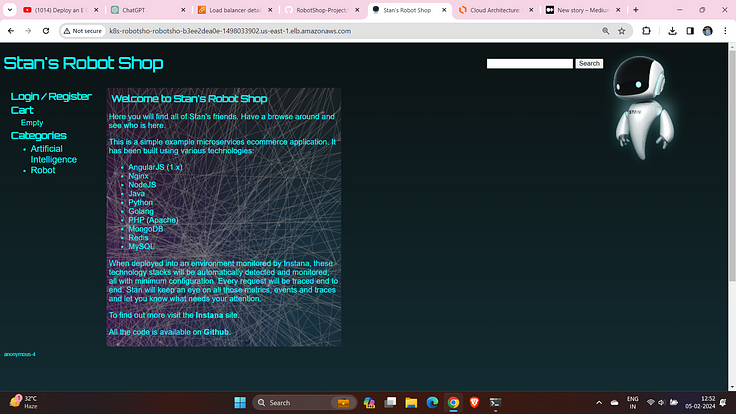
Get Register and login into the application.
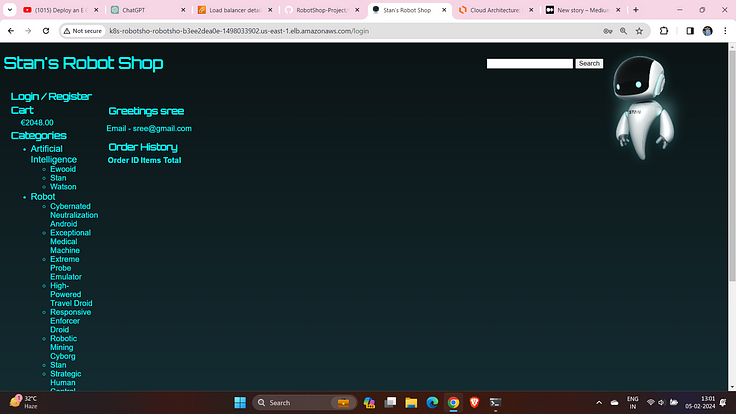
Rate the Artificial Intelligence.
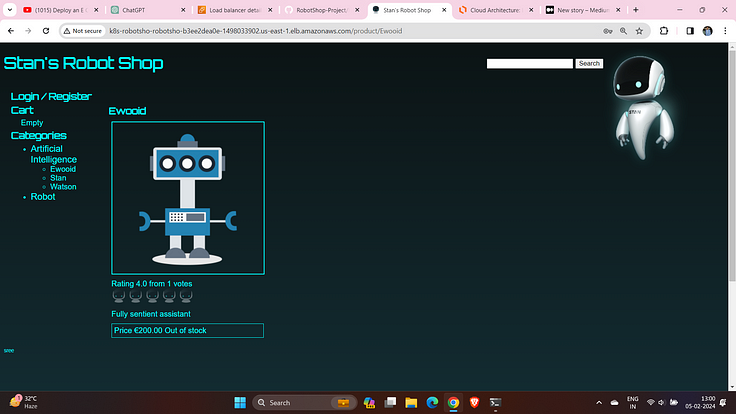
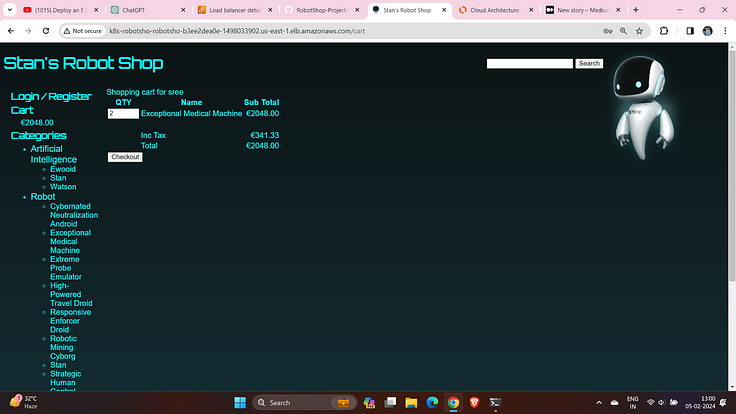
Add to cart the robots.
Checkout them.
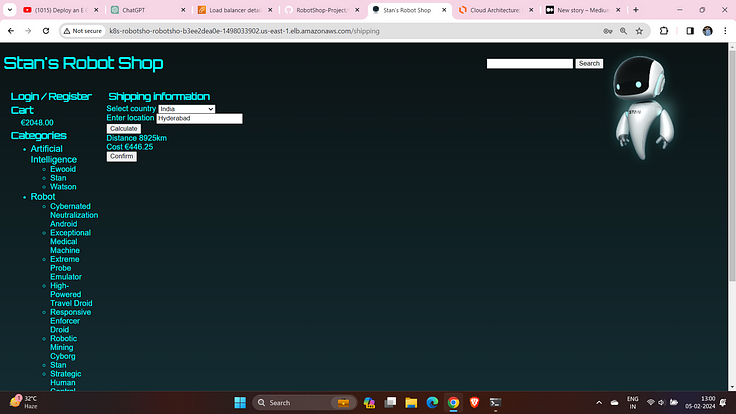
Select your Location and then calculate the price and confirm the order.
Then place the Order.
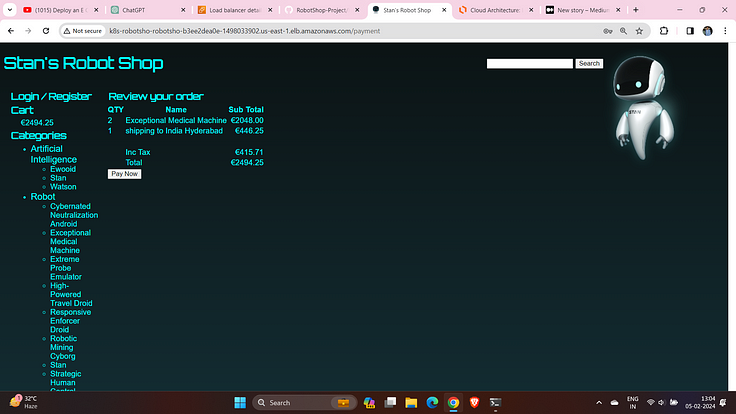
And pay the amount .
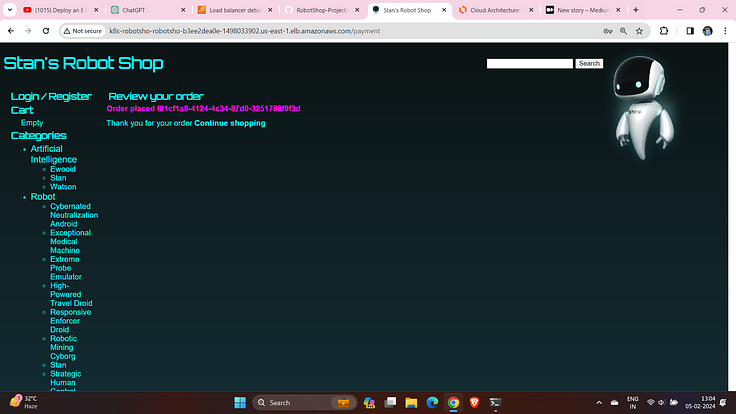
Congratulations… Your Order has been Successfully placed.. :)
🚀 Follow for more DevOps content, tips and tricks, and Hands-On Project Implementation.
Support 💖
- Help spread the word about ProDevOpsGuy by sharing it on social media and recommending it to your friends. 🗣️
- You can also sponsor 🏅 on Github Sponsors